Wednesday, September 21, 2016

Let the Honey Flow!

Hello, Beelicious Readers!

Our bees were pretty busy this last month making some serious honey in the honey super. We hadn't thought our girls would have enough honey to share with us this year as it's the first year in their home. We wanted to make sure they had plenty to eat over Winter before we took any honey from them. Well, the girls made a bunch of honey and we were able to take some of the surplus. How did it go? Well, let's get started!

We had a big harvesting day at Tim's. Tim had 5 honey supers to harvest, plus he had two friends come by to harvest their boxes as well. We spent over three hours uncapping the frames, testing the honey using a refractometer, loading and unloading the honey extractor and changing out the buckets for bottling. 

Our uncapping station
Honey extractor

Stack of boxes of empty frames

I love Tim's new art on his hive boxes. I created a "Tim Bee" for his honey labels. One of his friends is an artist and took the bee I made and put them all over his boxes. They are really cute!

Super cute, right?

After everyone took their honey and left, Tim, Al and I got my honey super off of my hive and brought it into the garage. There were a lot of bees around with the smell of honey in the air so we decided to harvest inside the garage. We put it on the table so I could check the individual frames before harvesting. 

Once I pulled out each frame to inspect them, each frame was full of honey, but only about 50% of them were capped. Once the bees cap each cell of a honey frame, you can bet that the moisture level of that honey is around 18%. You definitely don't want honey with a moisture level over 20% or it's on its way to fermenting. So instead of bottling directly from the hive, we decided to let the honey flow into a bucket so we could measure the moisture content before we bottled it. 

So how did it go? Well, check it out!


And, as promised, full disclosure, the flow frames leaked. A lot. We only opened two frames and the honey was leaking onto the table like crazy. We decided to close the frames so that I could take it home to make a mess in my own house. After discussing this issue with the Flow people and other beekeepers who use this harvesting method, it was discovered that when the bees do not cap the cells you are opening with the hive key, honey will leak over the sides of the cells and down the frame, which creates the puddles of honey underneath. The second harvest is generally much smoother as the bees seal them better as well. Next season, it should be better, so stay tuned...

What to do with a honey super you don't want making a mess on your kitchen counter? Put a dish rack tray underneath it! GENIUS! So we have a dish rack tray that has a hole which allows the water to drain toward your sink. I just used this methodology to let the honey flow into a bucket so we didn't lose any of it. You know what? It worked like a charm! Let's watch together! 


Ok, how cool is that?! We ended up testing each frame of honey with our refractometer and our honey was at 18.3% and absolutely delicious! The girls just hadn't had a chance to cap it. They did such a great job! It was incredibly exciting to finally be able to bottle our very first jar of our girls' honey. Being a beekeeper is so dang cool!

Once our bucket was full, I bottled all of our honey and we were able to harvest 29 pounds! It was a beautiful amber color.

Golden nectar!

Unbelievably, we have sold all of it already! We took a few jars for ourselves, but there were many folks who had placed orders which were filled immediately. We had a slew of very happy customers.

After all of this harvesting, Tim gave me another couple of pounds of wax so I could continue to make candles and lip balm. I know I talked about the candle making, but the lip balm has been a very popular item as well.

Bauden's Beelicious Balm

I have made both peppermint and cherry lip balms. It's a pretty even match on which people like the most. I've found an imitation Burt's Bees formula of coconut oil, shea butter, beeswax and organic peppermint oil or organic cherry oil. It's been so fun to make!


To say I've learned a lot this year would be a major understatement. Most of all, I've had a ball! Learning about honeybees is an ongoing event. There is always something new to learn with them. The cleaning of beeswax and using that wax for candles and lip balm has been amazingly fun. 

I have opened an Etsy shop to sell our honey, candles and lip balm. A huge thank you to everyone who has placed an order already. I've had such a good time making these things and am thrilled others have enjoyed them too. If you have a moment, please check it out!


Next stop is getting our girls ready for Winter. I'm heading over to Tim's this week to do mite counts, check brood frames, honey frames and overall health of our girls. I'll make sure to document all of that for you. This year has gone so fast, but what a year it has been!

Until next time, bee kind! 🐝

Friday, August 19, 2016

Wax On, Wax Off - Candle Making Day!

Hey everyone! I'm terribly sorry it's been so long since I last updated the blog. The bees are still working on their honey so I have no hive updates to report.  We have a game plan in place for September 10th to remove the honey super once drained and get our hives ready for Winter. I'll be documenting that for you once that begins. 

However, today is a much different kind of blog post. Today it's all about the wax from the hive!


So these were the wax cappings we got from the honey extraction process. I put the wax cappings in an old crock pot to melt. I added about two inches of water to the wax. The wax melted with the water as a HOT liquid. BEE CAREFUL! When that happens, I take a 2nd crock pot (but you can use a small bucket or bread pan, etc) and pour that liquid through an old T-shirt to filter out all of the debris that is mixed in the wax. I use a rubberband to secure the T-shirt to the 2nd crock pot. T-shirts work SO much better than cheese cloth as the fibers are tinier and catch more gunk.

Once the wax has begun to harden, the water will separate from it and will allow any remaining debris to fall to the bottom.  This is a clean wax cake that I took out of the crock pot after the wax hardened. How cool is that?


So what do I do with this cake of wax? Well, make candles of course! This is where the fun begins!


Alright, so the wax has melted and is totally clean and pure beeswax. I poured it into the bar molds and it looked like this:


You can see it's still liquified but it doesn't take too long to harden. The bars took about an hour or so before they were completely hardened. I had a lot of wax left so I took out a candle mold. It was exciting because I'd never done that before. Ok, I'd not done any of this, so it was a fun-filled day!


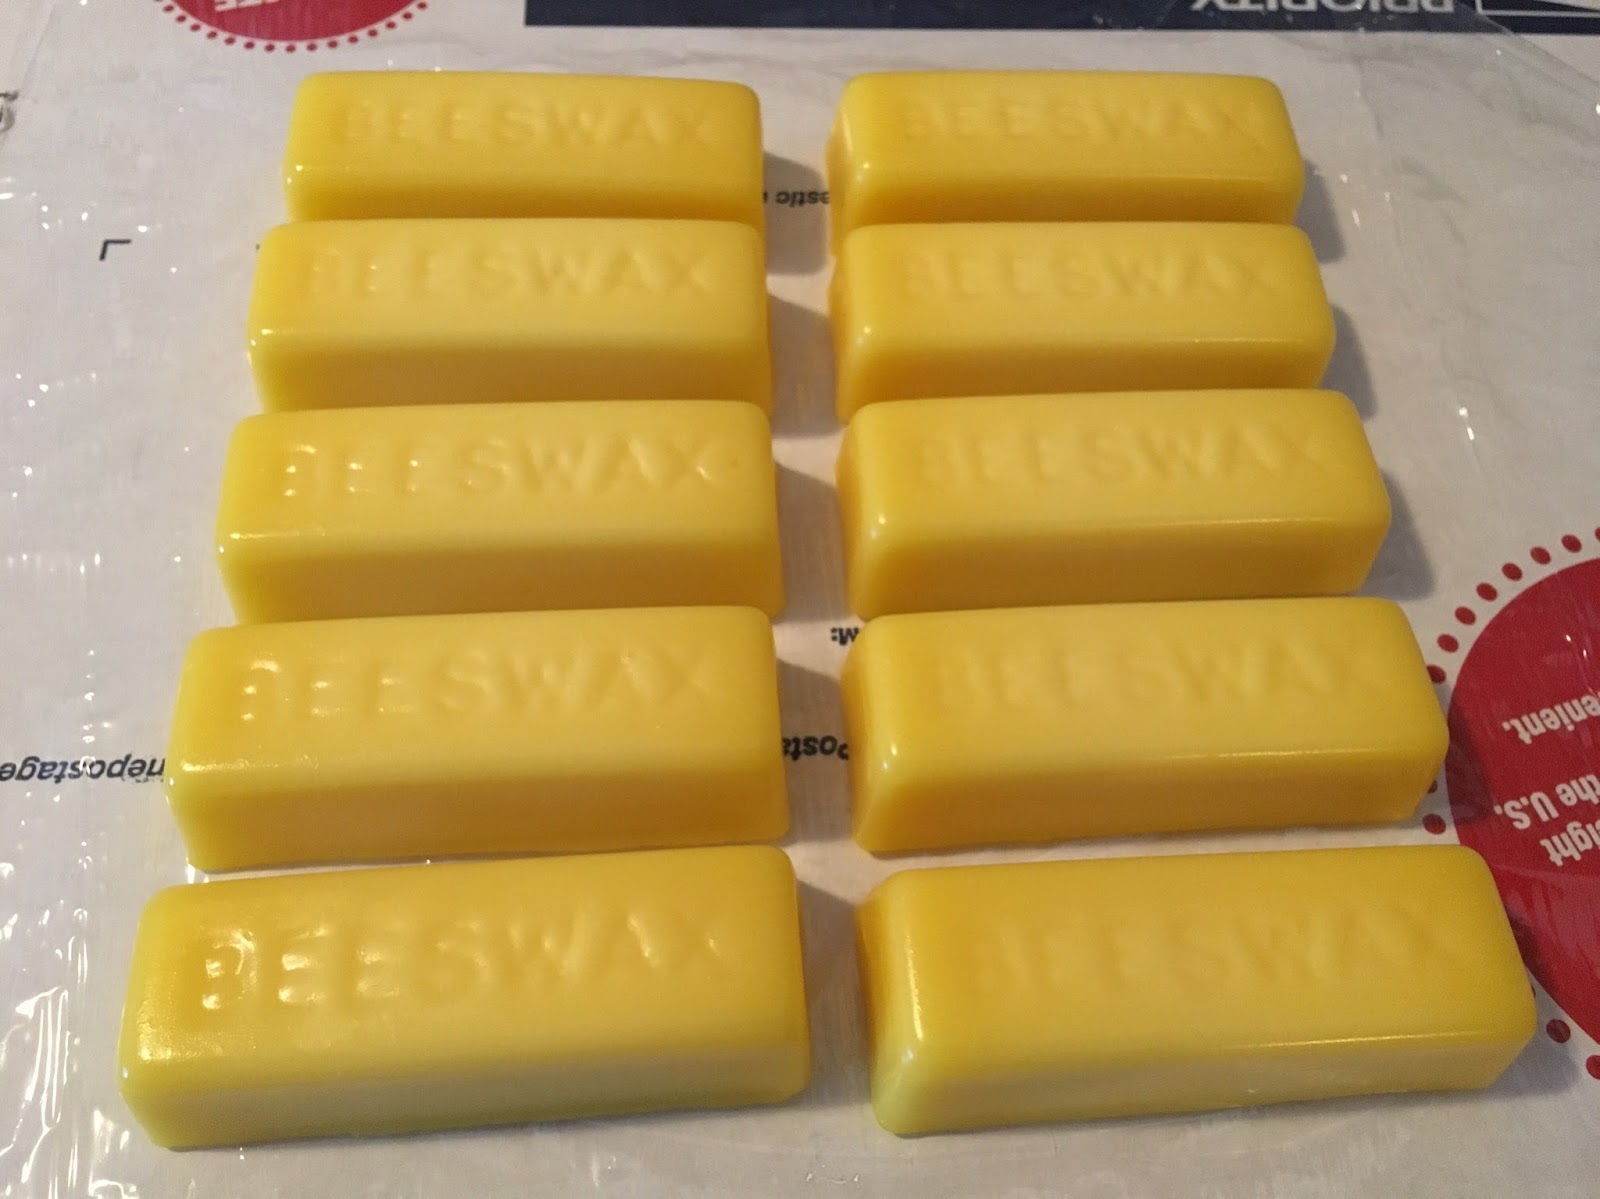
Here's what the bars look like once they are out of their molds. They say BEESWAX! How cool is that? Yes, I think it's all cool at this point.


Here was my work station after removing the first round of bars, pouring the 2nd round (you can see the wax in the molds is changing colors as it cools. The center mold is my candle mold, but that took several hours to cool before I could remove it. I just left it overnight so it would be ready in the morning. It was extremely difficult not to mess with it while it dried, but I refrained.


It was SO worth it! Look how cute this candle is! It's an old skep beehive with tiny bees on the side. Makes you think of Winnie the Pooh doesn't it? I have some vanilla scent but I didn't add it this time since I wanted to be sure I knew what I was doing. Next time I'll definitely add some scent. It's 3" x 2.5" and simply adorable!

The molds have been a big success. I think we're going to try lip balm too as beeswax lip balm is a popular thing. I saw a stick for $3.50 in a local store. Would you pay $3.50 for a stick of lip balm? Please let me know in the comments section. I saw my beehive candle at an online shop for $8 plus $8 shipping. I won't be charging that. I think $6 is much more appropriate. Let me know if you're interested. Like I said, I'll have regular and vanilla scented skep candles. Beeswax candles burn clean and for a little trivia, churches mostly use beeswax candles for that very reason.

This was such a fun endeavor and I'm happy to report that I have a bunch of wax ready to go. I have a feeling my weekend is going to be very busy. You know, like a bee - sorry, had to be done.

Until next time, bee kind! 🐝

Saturday, July 30, 2016

Honey Extraction Day with Tim & Friends

Hey guys! Today was a very fun day. I learned so much! 

Tim had 5 shallow honey supers to extract. We had 50 full frames as all of them were capped and ready! He invited 3 of us to help with the process so everyone had to play a part. We had to keep the garage door closed as some bees had discovered our hide out and wanted to check us out a little too closely!

There were two people in charge of uncapping the frames with a scratcher.

This is what a wax scratcher or fork looks like. It is one way to uncap the honey frames. There are also hot and cold knives that you can use to remove the cappings (by cutting the caps off) before you put the frames in the extractor. 

This is Kevin removing the caps from a frame.


Sue was the other uncapper at the table today.


All of the wax cappings go into a strainer that will drain whatever honey is in them into a bucket.

These are two of the strainers.
Strainers that go inside bucket to drain honey from wax.
Strainers in the draining bucket
After the honey is drained, you're left with a bunch of wax cappings that can be cleaned and used for many things. I'm going to attempt candle making and perhaps lip balm! We'll see how that goes.

Drained wax cappings
So after Kevin and Sue finished uncapping the frames, Tim would put them into the extractor. It holds nine frames, but he preferred to put six in saying it pulled the honey better. Listen to Tim, I always say!

Three frames of honey in the centrifuge before extraction.
The honey that came out was incredibly delicious and really a great color. My job was bottling all of the honey! I had a great system and rhythm going that I only had about a tablespoon or so of honey that leaked from the gate. Our grand total from the 50 frames? 146 pounds! WOW! 

The golden nectar!
Everyone was so efficient with their roles, that we had all 50 frames extracted and bottled in 2 hours! All of us had a great time learning the process and gaining more beekeeping friends. It was such a great morning. 

If you're in the area and want some local honey, be sure to contact me. I'll hook you up with some of the best liquid gold around.

Until next time, bee kind! 🐝

Monday, July 25, 2016

A First with the Bees

Happy Monday, everyone!

Last week I had a very special guest in the bee yard with me. My sister Mary Ann came for a visit and had wanted to see the bees since we installed our package. She's been living vicariously through my blog and photo texts. I think she was more excited to see the bees than I was! And that says a lot! 

She saw the best in beekeeping and learned what happens when you don't follow the recommended steps of opening a hive. One of the first things we did was go into Tim's big hive. The first frame he pulled, had lots of brood on it and we were given a real treat.


We weren't able to see the entire birth because the frame was heavy and Tim needed to put it down. How cool is that though? If you look to the left of the frame toward the end, you can see a 2nd baby chewing her way out of her cell. It was an awesome thing to witness, especially for Mary Ann's first visit to see the bees!

Tim was kind enough to open the rest of his hives so she could see as much as possible in her visit. She lives in Texas so it's not so easy for her to come play with me and the bees.

Tim was not finding a queen in one of his hives that he'd just re-queened with a queen grafted from his big hive. It was a disappointing afternoon for sure, but the very next day, he said he reopened the hive and found a big yellow queen on the first frame with lots of eggs. He just had to give her another day to show what she's made of. Needless to say, I was thrilled for him that he didn't have to get another queen for that hive. He has a queen from fantastic stock that will do awesome work if she's anything like the queen who made her.

A view from inside the Flow super
We took a quick look through the observation window of my honey super. She LOVED looking through the window to see them working without having to bother them.

Now for the lesson of the day. ALWAYS follow the proper steps when opening a hive!

Because he's just that awesome, Tim made a ventilation/winter board (it would also give the girls an upper entrance) for my hive a couple days prior. So I brought it home and stained it then brought it with me to put on the hive. Well, I had it in my head that I just needed to pop it on the top of the hive and put the cover back on. I wasn't thinking of the steps in between to achieve that result. Mind you, the honey super is the top box on the hive, so when I opened the hive WITHOUT smoking the bees first, well, they ambushed me and with good reason. I got my very first sting, thankfully just on my knuckle through my glove. I had about 50 bees on my veil ready to get at me any way they could. It was not the smartest move on my part, but the girls instantly reminded me that I need to follow the proper steps before accomplishing my goal for the day.

I know I'll continue to learn from my mistakes, but it'll only make me a better beekeeper. I was thrilled my sister came to play with us and she loved every minute of it! How could she not? Bees are so cool!


Until next time, bee kind! 🐝

Monday, July 18, 2016

More Views from the Honey Super

Hey guys!

I ventured over to Tim's to check on my girls. Can I just say again how much I love the observation window on this honey super? It's the coolest feature! Check out their activity today!


Lots more girls in the side window! Woohoo!

However, most times, there are usually more bees in the center of the hive as they tend to work their way out from the middle.

With that in mind, I took off the back viewing window (where we will do the harvesting of the honey) and checked to see if there were bees in the middle. Last week when I checked there weren't very many at all.

This was my view from today...


A much improved viewing! There are so many more bees in there sealing the gaps and working hard on filling the cells. To say I was excited would be an understatement for sure.

I have run out of honey from our first extraction already! Seventy pounds GONE in less than two weeks. I'll be sure to let you all know when we have more to sell. It's amazing to have such fresh honey!

Until next time, bee kind! 🐝

Friday, July 15, 2016

Girls Working the Honey Super

Hi guys!

This is just a quick post to show what my girls are up to in the honey super! I installed the Flow™ frames (honey super) a week ago and after a couple days there were only a few in the box. I went back yesterday and saw this...


They are really starting to work the frames and I could not be happier. The observation window is probably my favorite part of this honey super. So cool to watch them work without disrupting them at all. I'll post again next week! Have a great weekend!

Until next time, bee kind! 🐝

Wednesday, July 13, 2016

Bottling the Goodness that is Honey

Hello beelicious viewers! I participated in the fun experience last Friday (the 8th) of bottling pure delicious honey for the first time. It's quite a process and even a little messy. The good thing is you can always lick your fingers! 

Tim had extracted 2 mostly full buckets with near 70 pounds of honey inside as you know. Well, I offered to bottle that honey since I know we'll have so much more to bottle in a month or so. We'll have lots of work to do once the remainder of the honey supers are pulled from the hives. I'll be sure to have a special honey extraction blog post during that event. 

Tim lined up some bottles in the kitchen and the buckets close to the sink. After awhile I had gotten into a good rhythm and bottled it all within an hour or so. 


The gate on the honey bucket controlled the flow of honey into the jars. When it would spill, well, we'd have to wipe it off with our hands. No need to use water when that would be incredibly wasteful. This was liquid gold, after all.


Look at that amazing color! Tim had never harvested so early before but the nectar flow is still good so they'll fill up the boxes again in no time. 

Meanwhile, back at our personal hive...


I went to grab a peek in the observation windows but there was less than a handful of bees in the honey super. I know I need to be patient because the girls are going to do what they want exactly at the timeframe of their choosing. They will let me know when they're ready to deposit honey.

However, when I went back yesterday (Tuesday the 12th) I took a peek in the honey super again to find more girls working and sealing up the cracks!


I sure hope the number of girls continues to increase over the next couple weeks while the nectar flow is strong. They've done an amazing job in their house so I know they'll do a fantastic job in the honey super as well. 

Have a wonderful day and until next time, bee kind! 🐝